The Congrego® Data Pusher functionality allows users to configure an automated data output from the logger to either a file location, an FTP address or an e-mail address.
The data files are generated as CSV files using the format: RPT{ID}_{yyyyMMdd_HHmm}.csv
Example: RPT3_20190605_13:00.csv
To create a new output in the data pusher, use the New Data Pusher button and complete the setup details.

New Data Pusher
Label
Create a unique identifier for the data output
Report
Choose the source report to be used from the available list in the drop-down menu
Data Period
This is how much data is contained in each data “push” or file. When set to 1 hour, each file will contain 1 hour of data.
Push Interval
This is how often the data pusher is to be executed. The push interval determines the start and end data for each data file, which is also used to give the file for each period a unique name.
Example: When set to 1 hour, each file’s data will start and end on the hour, and the data pusher will generate one unique file for each hour, regardless of how often it is scheduled to run.
Time Stamps
Users can choose to use either local time or UTC for time/date stamps.
Timestamp Format
The timestamp format can be selected to be either:
•Combined (DateTime) e.g. with a label of Timestamp the date and time is output as 1970/01/01 13:02:03
•Separate (Date | Time) e.g. with a label of Date the date is output as 1970/01/01 and a label of Time the time is output as 13:02:03
Destination
Choose the desired output type, the available settings will change dependent on the output.
•File Output – type in the location for the file to be stored
•FTP – complete the details for the Host, port, security access and data file path.
•E-mail – input the destination e-mail address including options for CC and BCC fields. Note that multiple e-mail addresses can be sent using semi-colon separators.
•Eagle.io - pushes data to the eagle.io platform via a 'connector' application. This is still currently experimental, contact your local sales person for additional details.
Overwrite/Append
This handles the behaviour when the data push is scheduled to run more often than the push interval. When there is an existing file, it will either append new data to the file or overwrite the file.
Note that using "append" on a File or FTP job will move the start date (not end date) forward according to the push interval. This ensures that data is not repeated when appending a file. It has no effect on an email “push”.
Scheduling the Data Pusher
This will determine how often the schedule will run. It will perform the equivalent of clicking Run Now button at the scheduled times.
It has no effect on the amount of data in the file, or how often it will close an old file and create a new one.
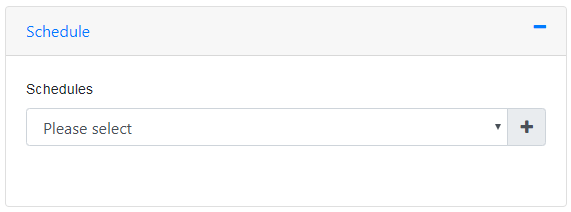
Use the Add button to create a new schedule. Note that multiple schedules can be created for a data push.

Add Schedule
First Run
Choose the start date and the start time for the schedule. This date can be set in the past.

Schedule First Run
Expiry
Choose the date and time for the schedule to end. It is not possible to set the end date as blank, but users may choose a date far in the future to ensure the schedule doesn’t stop running.

Schedule Expiry
Repeat Interval
The Repeat Interval defines the period after which the schedule will run again.

Schedule Repeat Interval - 7 Day Example
Run Filters
The filters determine when the schedule will and won't run, there are four available:
•Day Of Week - Any day or a specific day of the week
•Day Of Month - Any day, the final day of the month or a specific day
•Week Of Month - Any week, the final week or a specific week
•Month Of Year - Any month or a specific month
Schedule Missed
If an event occurs that prevents a schedule from running, such as a power failure, choose what to do when the system is operating again:
•Don't Run - Don't try and catch up on the missed schedule(s)
•Run Once - Run the schedule once
•Run Every Interval - Run the schedule for every repeat interval missed up to the current time
Enable/Disable
Use this switch to disable a schedule temporarily.
Removing a Schedule
Users can choose to remove or delete a schedule.
To remove a schedule, choose Remove Schedule at the bottom of the menu.
Remove Schedule
The schedule will be removed but this change will not be persisted until the Save button is selected.
Example
With the following settings:
Data Period = 8 hours
Push Interval = 5 minutes
Schedule = every hour (overwrite)
Every hour a new file will be created containing the last 8 hours data, ending at the last 5 minute block.
So, if the schedule runs at 10:27, the data will be from 02:25 to 10:25.
The data interval (data period) is actually not how often the data is sent, it is the period of the data being sent in the file, the scheduler controls how often the data is sent.
So if the schedule kicks off at 14:22:18 with a 1 hour data period, you will get data from 13:22:18 to 14:22:18. |