Calibration checks and processes are an essential part of system operations.
Congrego®'s ability to control and trigger instruments and devices in the system allows operators to design calibration sequences and processes that can be run either manually or automatically using the scheduler.
Note that the Congrego® Lite licence does not allow the use of Calibrations. |
The Calibrations tab is where users can define and manage these automated calibration checks. Users can create calibration sequences with calibration points, digital triggers and other functions.
There are no limitations to the number of sequences that can be created, or the number of points within a sequence.
Manual control of calibration sequences and points is through the Calibrations Widget on the Dashboard.
Creating a Calibration Sequence
To create a new calibration or process, select the Add Calibration button and complete the setup to define the instruments involved, the data to be flagged, the specific processes to occur and the schedule to be used for each new calibration sequence.

Add Calibration
General
Label
Create a label for the new process. Example: Daily Z/S
Description
A general description for the process example: daily zero and span check
Instruments Involved
Use the check-boxes to select all of the instruments that will be impacted by, and involved in, the process. This list informs the point configuration menu selections (don’t forget the calibrator).

Instruments Involved
Channels Affected by Calibration
Select all of the channels which will have data impacted by the process i.e. All of the channels you wish to have flagged as being In Calibration when the process is running.
This will typically mean gas analyser concentration channels are checked but not the ambient pressure or chassis temperature channels etc.
When making a selection, users can either select all of the channels associated with an instrument by selecting the instrument box or select individual channels by selecting each channel box.

Select Channels
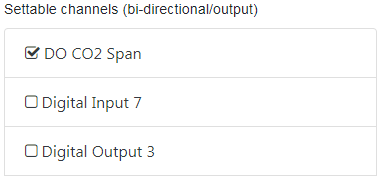
Settable Channels (Bi-Directional/Output)
The Settable Channels section shows any channels in the system that are either bi-directional or output channels and as such can be assigned a value e.g. a digital output channel.

Settable Channels
Selecting a channel or channels in this section will make the selections available in the Points Configuration and will allow the channel to be set to a specified value during that point.
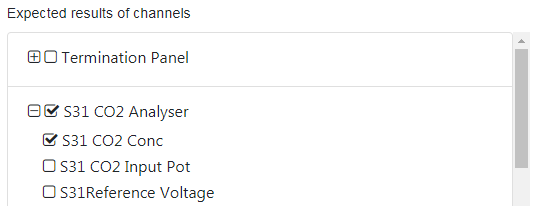
Expected Results of Channels
Select all of the channels that will have an expected result. e.g. the gas concentrations should have an expected value for a particular calibration point.

Expected Results Channel Selection
This will inform the Point Configuration setup and can be used to determine some automatic alarms.
Point Configuration
In the Point Configuration menu, users create points they wish to run in the calibration sequence.
Each point includes instructions to all of the instruments involved as well as the expected results for channels selected in the General Setup menu.
To create a new point for the calibration sequence, users can select the Add Point button and complete the setup to create a new point, or use the Clone button and add and edit an existing point in the sequence.

Point Button Options
Creating a new point
Use the Add Point button to create a new point and complete the setup menu.
Calibration Point
All of the available calibration points in the sequence will appear in the drop-down menu. This will let users select an existing point to modify. When adding the first point, this list will be blank, go to the Point Type.

Calibration Points
Point Type
Here users define what sort of point is being configured, either a zero, a span or a stabilization point. This choice lets Congrego® delineate results within a sequence and allows for quick searches of span or zero results.
Point Label
Create a descriptive label for the point, example: Span 400ppb
Average
Select the averaging period to be used when storing the point result, example: When set to 2 minutes, Congrego® will average the results for the last 2 minutes of the point and record this as the result.
Note that the duration is displayed in milliseconds and the time picker has selections for Hours : Minutes : Seconds.
Duration
Choose how long the point should run for.
Note that the duration is displayed in milliseconds and the time picker has selections for Hours : Minutes : Seconds.
Set Instrument States
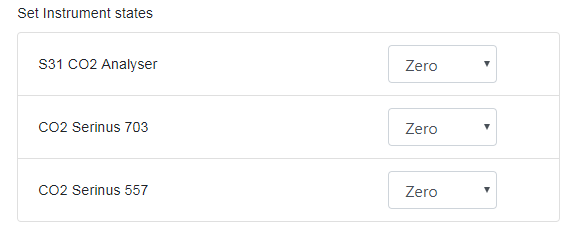
All of the instruments selected in the Instruments Involved section of the Setup Menu will appear in the list.
For each instrument, choose which state it should be in while the point is running example: Zero Mode, Span Mode or Measure Mode. The options will change for different instruments and are defined in the instrument driver.

Set Instrument States
For calibrators, choose which of the pre-defined calibration points, setup on the calibrator itself, should be running when the Calibration Point is active example: Idle Mode, Point 3, Point 7, Stop.
Set Expected Channel Values
Set the expected result for the point for each of the channels selected in the Expected Results of Channels setup menu. Example: NO2 channel should have a result of 400 during the Span point.
When the point setup has been completed, users can choose to add further new points to the sequence or clone the point and edit it to create more points.

Expected Channel Values
Cloning a Point
Cloning points allows users to fast-track the calibration sequence setup process.
First select the point to be cloned/copied from the available points in the drop-down menu, then select the Clone Point button.
The cloned point can now be edited as required.

Clone Point
Once the calibration sequence has been setup, users can choose to save the calibration using the Save button as an un-scheduled calibration, which can be operated manually, or create a schedule for the calibration sequence.
Schedules
A calibration sequence can be automated to run on a user defined schedule, with many options to define limitations within a schedule, such as run every day except Sundays.
To create a schedule for a calibration sequence, select the calibration from the available menu on the left and expand the Schedules Setup Menu on the right.
To create a new schedule, use the plus button on the right of the drop down menu and complete the configuration.

Add Schedule
Note that multiple schedules can be created for a sequence.
First Run
Choose the start date and the start time for the schedule. This date can be set in the past.

Schedule First Run
Expiry
Choose the date and time for the schedule to end. It is not possible to set the end date as blank, but users may choose a date far in the future to ensure the schedule doesn’t stop running.

Schedule Expiry
Repeat Interval
The Repeat Interval defines the period after which the schedule will run again.

Schedule Repeat Interval - 7 Day Example
Run Filters
The filters determine when the schedule will and won't run, there are four available:
•Day Of Week - Any day or a specific day of the week
•Day Of Month - Any day, the final day of the month or a specific day
•Week Of Month - Any week, the final week or a specific week
•Month Of Year - Any month or a specific month
Schedule Missed
If an event occurs that prevents a schedule from running, such as a power failure, choose what to do when the system is operating again:
•Don't Run - Don't try and catch up on the missed schedule(s)
•Run Once - Run the schedule once
•Run Every Interval - Run the schedule for every repeat interval missed up to the current time
Enable/Disable
Use this switch to disable a schedule temporarily.
Removing a Schedule
Users can choose to remove or delete a schedule.
To remove a schedule, choose Remove Schedule at the bottom of the menu.
Remove Schedule
The schedule will be removed but this change will not be persisted until the Save button is selected.