The Instrument dialog allows the user to set and edit the properties for a new or existing instrument.
TCP/IP = Transmission Control Protocol/Internet Protocol - a set of network protocols that allows two or more computers to communicate UDP = User Datagram Protocol - an alternative communication protocol to TCP used for establishing low latency and loss-tolerant connections |
General Settings
A number of required fields need filling by the user before the application will allow the settings to be saved. All fields are validated and any invalid fields are denoted by a red indicator around the control or field in question.
Manufacturer
The instrument manufacturer, or make, is selected from a prepopulated list. This is a required field.
If your instrument does not appear in the available instruments list then you may choose to add the unit as a Generic device and use an existing standard protocol to communicate such as Bayern-Hessen or Modbus.
Model
The manufacturer selection will influence the list of models available in the dropdown list. The user must select the instrument model from this list, this is a required field.
Instead a new instrument must be created with the new Manufacturer and Model settings. |
Label
A unique label supplied by the user to allow easy identification of the instrument, this is a required field.
The label, which is usually automatically generated, is used as the identifier in Congrego®. However changing the label at a later date will not impact data storage and the new label will continue to be associated with the original channel.
Description
An optional free-text field allowing the user to enter a descriptive summary of the instrument or additional notes.
Protocol
The driver protocol selection is determined by the number of protocols implemented in the selected instruments driver. Many instruments may only support a single protocol while other support multiple protocols. The selection here is also determined by any restrictions on the protocols used in an existing network and the physical connection between the host computer and the instrument.
Serial Number
This is an optional field that allows the user to easily identify an instrument by its given serial number.
Enabled
This slider denotes if the instrument is enabled or not. A disabled instrument will no longer be polled.
Advanced Settings
TCP Passthrough Port
This is the TCP port through which a TCP connection can access a serial or USB device.
Note that the TCP passthrough component will not be enabled until the Enabled/Disabled toggle switch on the control is clicked. Any communication on this port will stop the polling of the instrument.
Clock Synchronisation
If clock synchronisation is enabled, then additional settings are shown. Here users can choose to set an allowable drift tolerance for the time synchronisation as well as the time zone and an offset.
Setting an offset for the time synchronisation allows users to set and maintain an instrument clock to be faster or slower than the actual (logger) time by a specific amount. This can be useful when communications to an instrument must not be performed at specific times (for example communication with a Spirant BAM at the start of the hour).
Time Zone
Make a selection from the available options.
Clock Drift Tolerance
This value, in seconds, determined how far the instrument clock is allowed to drift before it is corrected.
Clock Offset
This value, in seconds, is the offset to be applied to the instrument clock in relation to the system clock.
Connection Settings
Persistent or On-Demand
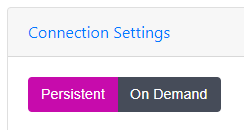
Persistant or On Demand
For Persistent connections, the logger holds the comm port open and regularly communicates with the instrument. On Demand connections will only open the port when required for communication.
Device ID
This is the instrument’s communication ID and should match the analyser settings.
Some instruments require an identifier if there are multiple instruments of the same type on the same connection e.g. when instruments are multi-dropped.
This is a free-text field and validation is not performed as the identifier is specific to the instrument type. |
Device Arguments
Typically only used for TCP and custom connections. This allows for additional instructions to be entered in the communication string.
Polling Interval
The polling interval is specified in seconds and is the duration between successive polls of the instrument. This is typically ten seconds.
Polling Timeout
This is the allowed time for a response from the instrument (typically one second). If the logger does not receive a response from the instrument within the timeout period, it will make several further attempts and then stop and mark the instrument as Offline.
Discovered Instruments Function
If connecting to an Ecotech product via USB or TCP, the Discovered Instruments feature may appear as an option.
Congrego® can automatically scan and find available Ecotech products connected to the logger through USB and TCP connections. Simply click on the “refresh” button on the right hand side of the bar, Congrego® will search for connected instruments and populate the drop-down menu. Select the correct discovered instrument from the menu.

Discovered Instruments
Connection Type Selection
Connection
This is the physical connection between the host computer and the instrument. The user may select an option and usually the default will be the settings available in the selected driver. The settings fields will change according to the connection selection.
This is the communication port on the host machine through which communication with the instrument is performed. If a port has not already been selected the field will be empty and clicking in the control will show a dropdown list of all of the available ports on the host machine.
These settings should match the analyser settings.
Baud Rate
The baud rate is the maximum rate, measured in bits per second, for serial transmission of data between the host machine and the instrument. The rates are predefined and available in the dropdown list.
Data Bits
This is the number of bits in the message that contain data. This selection is available from the dropdown list.
Parity
Parity is a method for detecting errors in the transmission. The number of bits used in the parity check can be selected from the dropdown list.
Stop Bits
The stop bits denote the end of the transmission, this value is selected from the dropdown list.
Handshake
Software flow control (handshaking) can be selected from the dropdown list.
The user must first select the connection type as USB and then use the Discovered Instruments feature.
Congrego® will search for the available USB connections and will populate the connection settings once the instrument has been selected from the drop-down menu.
Ensure the appropriate USB driver for the instrument has been previously installed.
Host
Enter the IP address of the instrument in this field. Depending on the user network configuration the host name of the instrument may also be used e.g. myinstrument.mydomain.local
Port
Enter the port number on the instrument that communication will take place through.
Where possible the default port numbers for the instrument will be set automatically by Congrego®.
Set the correct IP address and ensure the port number is correct for the instrument.
For TCP connections, the Discover Instruments feature can be used to automatically add instruments when connecting to most Ecotech products.
Host and Port - see TCP settings.
For UDP connections, the Discover Instruments feature can be used to automatically add instruments when connecting to most Ecotech products.
Custom connections allows for several specific and unique instrument inputs such as the Yocto Watchdog.
Saving the New Instrument
Once the instrument setup is completed, select Save from the top of the menu. Note that the Save button is only available once all of the necessary parameters have been completed.
Once saved, the server will re-start and the new instrument will appear in the instrument list, including a description of the instrument and the connection properties.
The instrument list can be sorted alphabetically using the menu at the top of the list. Users can also filter the instruments displayed using the Search feature.
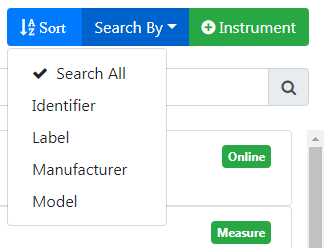
Search Options
For each analyser in the list, a Status Bar will also be displayed:
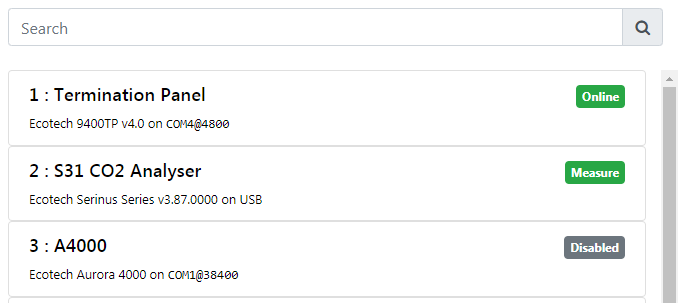
Status Example
|
|
Instrument is available (communication type set to On Demand) |
|
Instrument is not communicating |
|
Instrument is set to Disabled in the Instrument menu |
If the Instrument Status is displayed as Offline, select the instrument and an error message will be displayed at the top of the Instrument Settings menu on the right. 'Online' may be substituted with the instrument's state (such as 'measure', or 'calibration') for instruments which support states.

Instrument Error Example
Saved Instruments
For each connected Instrument, two new menu items will be displayed.
Remote
Remote control is available for some instruments supported by Congrego®.
If remote control is available on the connected instrument then the Remote button will be displayed.

Remote Control Button
Clicking the button will establish a connection with the instrument, if the communication settings are configured correctly, and the remote screen will be displayed.
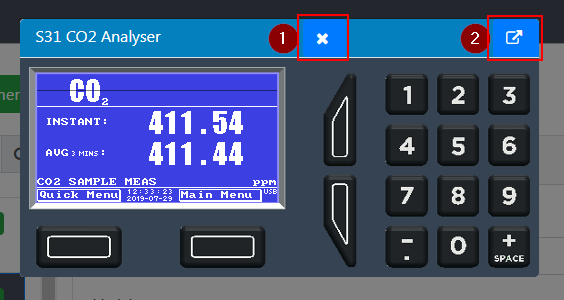
Remote Screen (Serinus series example)
Functionality will differ on the remote screen depending on the instrument type but for each screen
•Button 1 will close the remote connection
•Button 2 will open the remote screen in a new tab in the browser
Generate Default Channels
The Generate Default Channels feature allows a user to quickly bulk add channels for the newly connected instrument instead of having to add them individually.

Generate Default Channels
Each instrument driver will specify what channels are available on the instrument. By expanding the Generate Default Channels section the user can select the channels that they want to add.
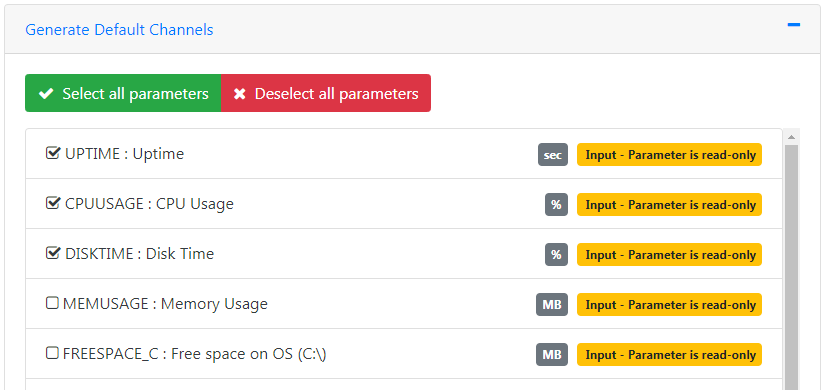
Generate Default Channels Selection
Select the channels that are to be added and save the Instrument settings.
On saving the selected channels will be added to any report that has the Automatically Generated option enabled.
